TIMERshare Docs | FREE ONLINE TIMER
ℹ️ FAQ↩️ Return to Home
English
English
  • Getting Started with TIMERshare
  • Quick Start
    • Create a Timer
      • Create a Stage
      • Edit the Timer
      • Add or Edit Sections
    • Customize
      • Manage Remaining Time
        • Edit Progress Bar
        • Set Flash
        • Set Chime Sound
      • Edit Layout
    • Share the Timer
      • Get a Share Link
      • Manage Connected Devices
    • Other Settings and Operations
      • Perform Flash or Blackout at Any Time
      • Exclude Specific Sections from Stage Progress
      • Adjust Ongoing Timer Duration
      • Auto-Start Timers
      • Rename Connected Devices
      • Operations Using URL Parameters (List)
        • Specify Default Connected Device Name
        • Separate Timer, Title, and Progress Bar on the Viewer Screen
        • Hide Buttons on the Viewer Screen
        • Set Viewer Screen Background to Transparent
        • Flip Viewer Screen
      • Flip Viewer Screen
      • Change Time Zone
      • Use Gradient for Background
  • Use Cases
    • Self-Tasks
    • Meetings
    • Presentations
    • Events
    • Live Streams
    • Webinars
    • Academic Presentations
    • Online Classes & Education
    • Pair/Mob Programming
  • Integration
    • Live Streaming Tools
      • OBS Studio
      • Xsplit Broadcaster
    • Online Meeting Tools
      • Zoom
      • Microsoft Teams
      • Webex Meetings
      • Google Meet
      • Skype
      • Whereby meetings
  • Reference
    • About the operation screen
      • controller
      • viewer
    • List of Access Permissions
  • Resources
    • Usage Limits and Restrictions
    • System Requirements
    • Release Notes
    • FAQ
    • Terms of Service
    • Privacy Policy
    • Cookie Policy
    • Maintenance information
  • ↩️ Return to Home
Powered by GitBook
On this page
  • Display Timer Over Your Camera
  • 1. Set Up the Virtual Camera in a Live Streaming Tool
  • 2. Join the Online Meeting and Switch the Camera to Virtual Camera
  • 🎉 The camera with the timer can now be used in the online meeting
  • Add an Independent Timer to the Meeting
  • 1. Set Up the Virtual Camera in a Live Streaming Tool
  • 2. Join the Online Meeting as the Main User
  • 3. Add a Sub-User to the Online Meeting
  • 4. Switch the sub-user’s camera to a virtual camera and join in companion mode
  • 🎉 An independent timer has been successfully set up in the online meeting

Was this helpful?

  1. Integration
  2. Online Meeting Tools

Google Meet

Step-by-step instructions on how to integrate Google Meet with TIMERshare using the virtual camera feature in OBS Studio or similar live streaming tools.
PreviousWebex MeetingsNextSkype

Last updated 6 months ago

Was this helpful?

TIMERshare can be easily integrated with Google Meet in OBS Studio and other live streaming tools. This integration allows you to display the timer directly over your camera or use it as a standalone timer.

In online meeting tools, the background and camera, including the timer, may appear flipped in the self-view, but other participants see it correctly. Some tools offer a 'Mirror my video' setting that can be disabled, allowing you to see the self-view in the same orientation as other participants.

For more details, please refer to the software's FAQs.

The following step-by-step instructions may vary depending on your environment or software version. Please note that this is not a guide for using the software itself. Company and product names mentioned are trademarks or registered trademarks of their respective owners.


Display Timer Over Your Camera

1. Set Up the Virtual Camera in a Live Streaming Tool

2. Join the Online Meeting and Switch the Camera to Virtual Camera
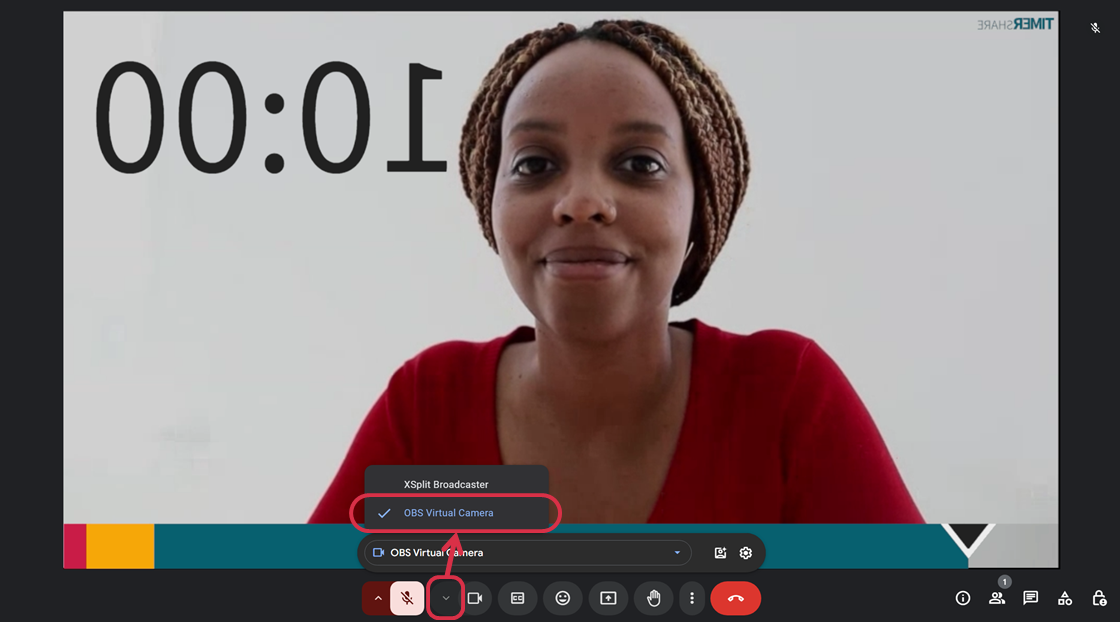
In the meeting, click the small arrow next to the camera icon and select "OBS Virtual Camera" or a similar virtual camera.

🎉 The camera with the timer can now be used in the online meeting
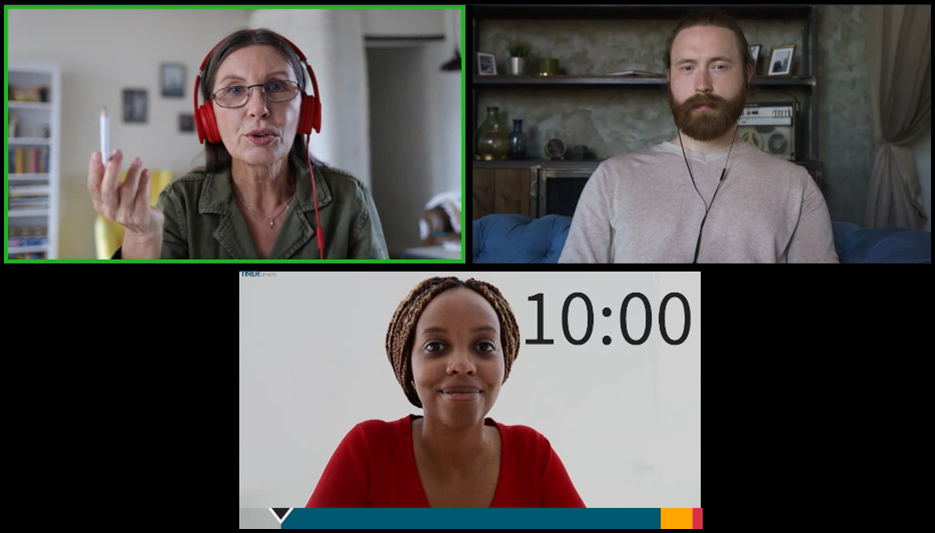
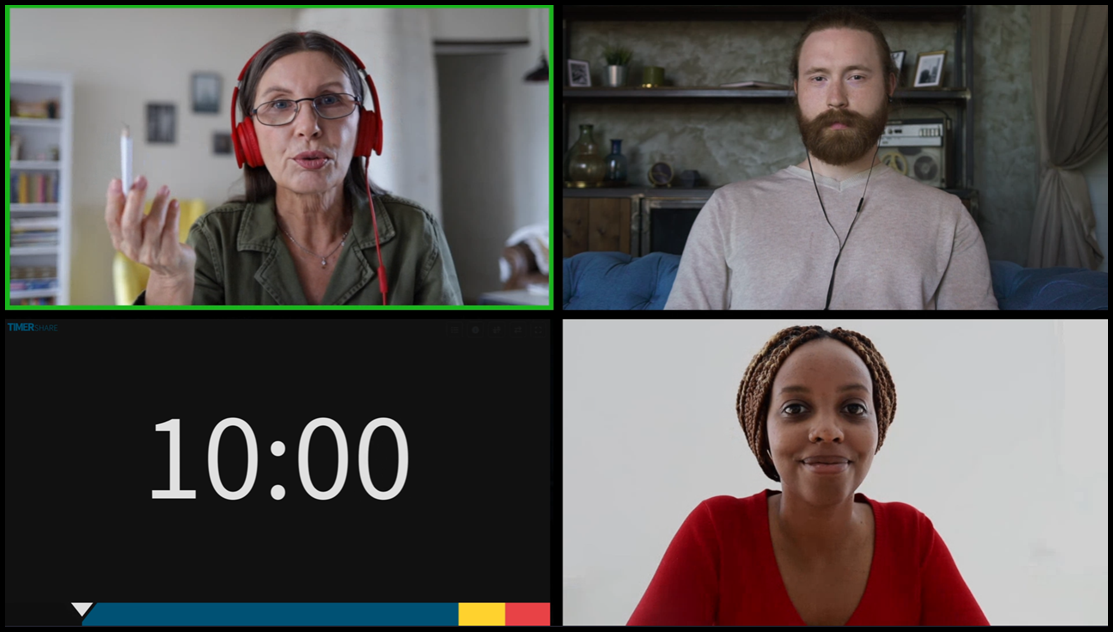
Depending on the settings of your streaming tool, you can display the timer over the camera or show only the timer.

By the way, TIMERshare can be accessed via a browser from any internet-connected device (Desktop/Mobile), making it easy to control the timer from your smartphone without switching browsers during a meeting.


Add an Independent Timer to the Meeting

Even if other participants share their screens for a slideshow, the displayed timer will remain visible.

1. Set Up the Virtual Camera in a Live Streaming Tool

2. Join the Online Meeting as the Main User

Join as usual, enabling your microphone and main (default) camera if needed.

3. Add a Sub-User to the Online Meeting
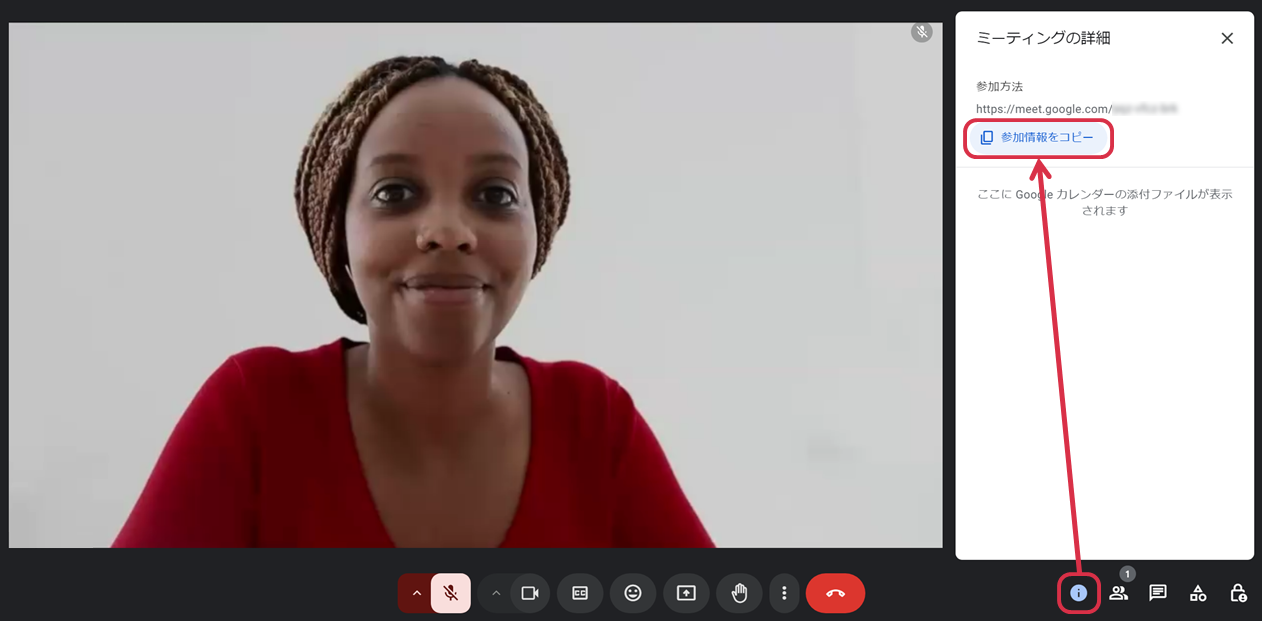
Obtain the invitation link (URL for participation) and access it from another browser or tab.

4. Switch the sub-user’s camera to a virtual camera and join in companion mode
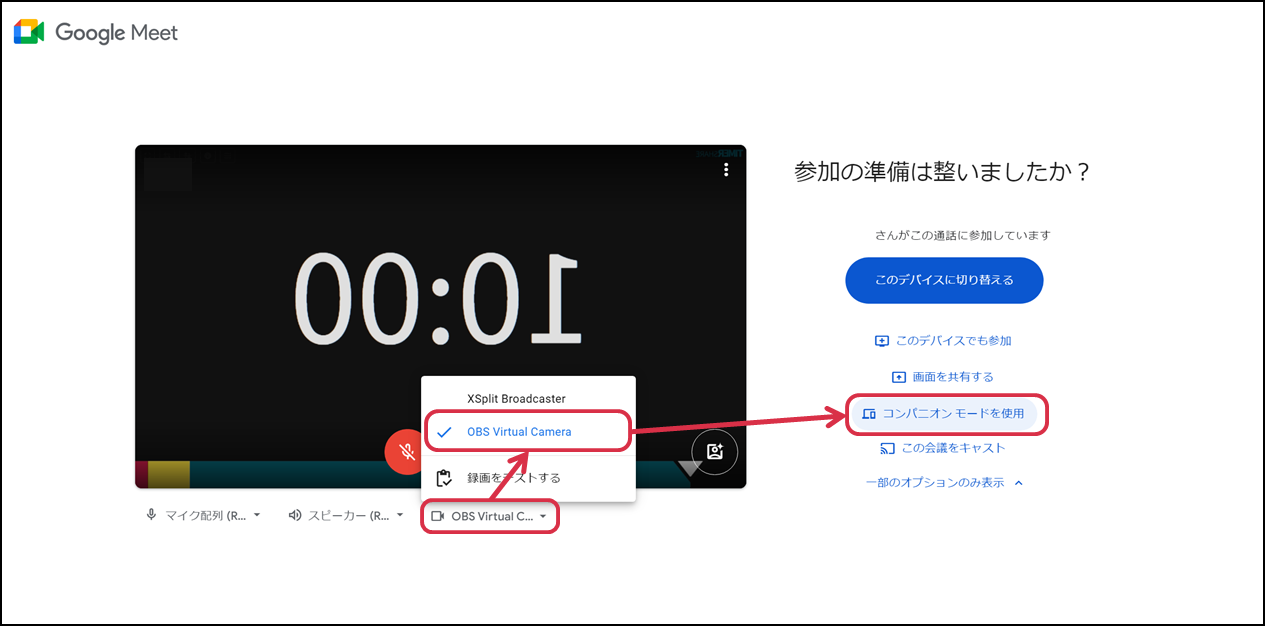
Select the small arrow next to the camera symbol and change the camera to a virtual camera like "OBS Virtual Camera."

Google Meet offers a companion mode for multi-screen participation, which you can use to join the meeting.

During this setup, turn off the sub-user's microphone. It is recommended to use the main user's microphone for the meeting.

🎉 An independent timer has been successfully set up in the online meeting

By the way, TIMERshare is accessible from any internet-connected device (Desktop/Mobile) via a browser, making it easy to control the timer from your smartphone without switching browsers during the meeting.

If there’s no screen sharing during the meeting, you can set the sub-user’s screen to 'Spotlight' or 'Pin for Everyone' (names may vary depending on the tool) to make the timer more noticeable to participants.

. If participants need to hear the chime, consider separately from the meeting tool.

Configure the settings in .

If using OBS Studio as the virtual camera in an online meeting tool, beforehand.

Configure the settings in .

If using OBS Studio as the virtual camera in an online meeting tool, beforehand.

your live streaming tool
You can use the online timer tool without registration and for free anytime from the "Create Timer" button on the homepage.
using the virtual camera feature
sharing the viewer screen
Integrating the timer's chime sound is currently challenging
select "Start Virtual Camera" from "Controls"
Set up a timer for meetin
Select the virtual camera
Display TIMERshare in Online Meetings
Get the invitation link
Select Virtual Camera and join in Companion Mode
Display TIMERshare in Online Meetings
ミーテイングにタイマーを設置する
仮想カメラを選択して、コンパニオンモードで参加
オンライン会議でTIMERshareを表示
仮想カメラを選択