# Skype
{% hint style="success" %}
[You can use the online timer tool without registration and for free anytime from the "Create Timer" button on the homepage.](https://timer-share.com/)
{% endhint %}
TIMERshare can be easily integrated with **Skype** [using the virtual camera feature](https://docs.timer-share.com/en/integration/live-streaming) in OBS Studio and other live streaming tools.\
This integration allows you to display the timer directly over your camera or use it as a standalone timer.
Set up a timer for meetings.
{% hint style="success" %}
In online meeting tools, the background and camera, including the timer, may appear flipped in the self-view, but other participants see it correctly.\
Some tools offer a 'Mirror my video' setting that can be disabled, allowing you to see the self-view in the same orientation as other participants.
For more details, please refer to the software's FAQs.
{% endhint %}
{% hint style="warning" %}
[Integrating the timer's chime sound is currently challenging](https://docs.timer-share.com/en/integration/online-meeting-tools/..#integrating-timer-chime-sound-with-online-meeting-tools). If participants need to hear the chime, consider [sharing the viewer screen](https://docs.timer-share.com/en/quick-start/share/get-share-link) separately from the meeting tool.
{% endhint %}
> The following step-by-step instructions may vary depending on your environment or software version. Please note that this is not a guide for using the software itself.\
> Company and product names mentioned are trademarks or registered trademarks of their respective owners.
***
## Display Timer Over Your Camera
### 1. Set Up the Virtual Camera in a Live Streaming Tool
Configure the settings in [your live streaming tool](https://docs.timer-share.com/en/integration/live-streaming).
{% hint style="warning" %}
If using OBS Studio as the virtual camera in an online meeting tool, [select "Start Virtual Camera" from "Controls"](https://docs.timer-share.com/en/live-streaming/integration-with-obs-studio#using-obs-studios-virtual-camera-with-online-meeting-tools) beforehand.
{% endhint %}
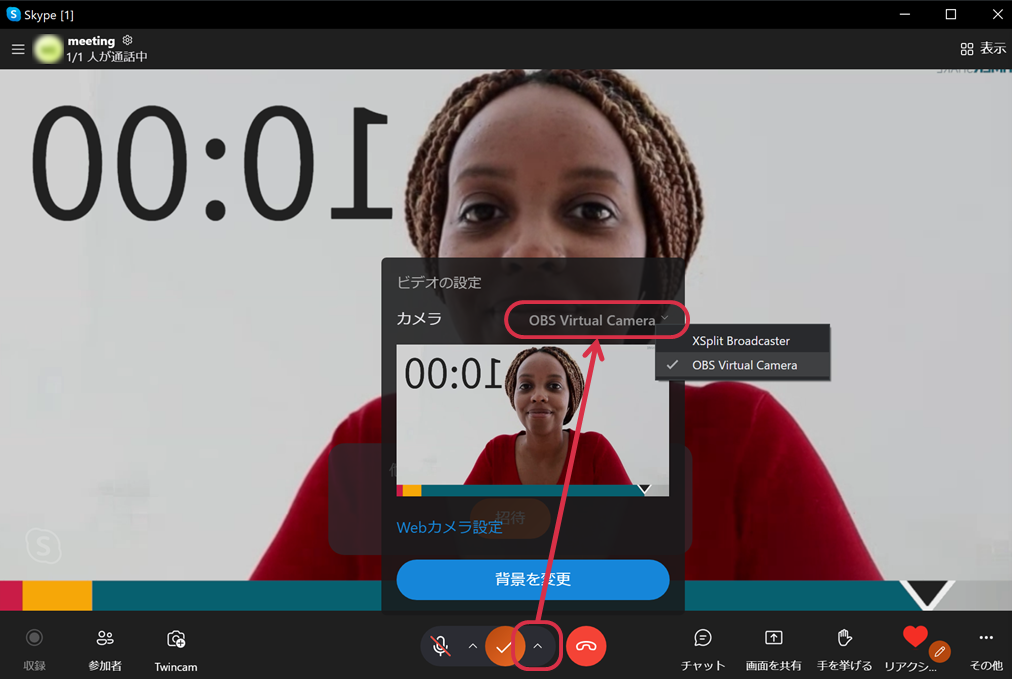
### 2. Join the Online Meeting and Switch the Camera to Virtual Camera
In the meeting, click the small arrow next to the camera icon and select "OBS Virtual Camera" or a similar virtual camera.
Select the virtual camera
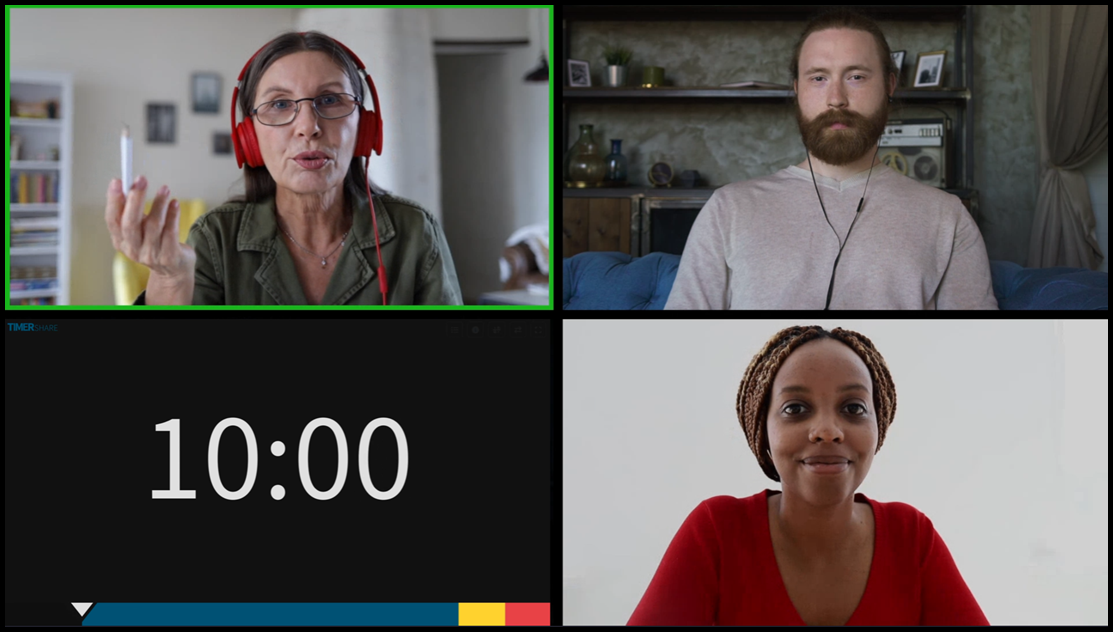
### 🎉 The camera with the timer can now be used in the online meeting
Depending on the settings of your streaming tool, you can display the timer over the camera or show only the timer.
Display TIMERshare in Online Meetings
By the way, TIMERshare can be accessed via a browser from any internet-connected device (Desktop/Mobile), making it easy to control the timer from your smartphone without switching browsers during a meeting.
***
## **Add an Independent Timer to the Meeting**
Even if other participants share their screens for a slideshow, the displayed timer will remain visible.
### 1. Set Up the Virtual Camera in a Live Streaming Tool
Configure the settings in [your live streaming tool](https://docs.timer-share.com/en/integration/live-streaming).
{% hint style="warning" %}
If using OBS Studio as the virtual camera in an online meeting tool, [select "Start Virtual Camera" from "Controls"](https://docs.timer-share.com/en/live-streaming/integration-with-obs-studio#using-obs-studios-virtual-camera-with-online-meeting-tools) beforehand.
{% endhint %}
### 2. Join the Online Meeting as the Main User
Join as usual, enabling your microphone and main (default) camera if needed.
### 3. Add a Sub-User to the Online Meeting
{% hint style="info" %}
For app-based tools like Zoom or Microsoft Teams, invite a separate user by accessing the invitation link (join URL) via a browser.
{% endhint %}
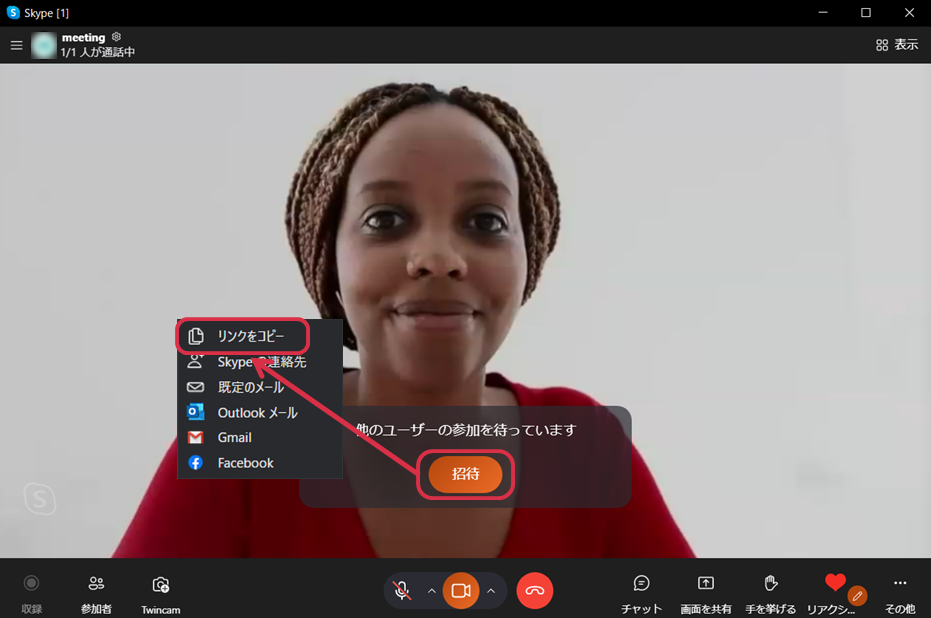
#### ① Copy the invitation link
Get the invitation link
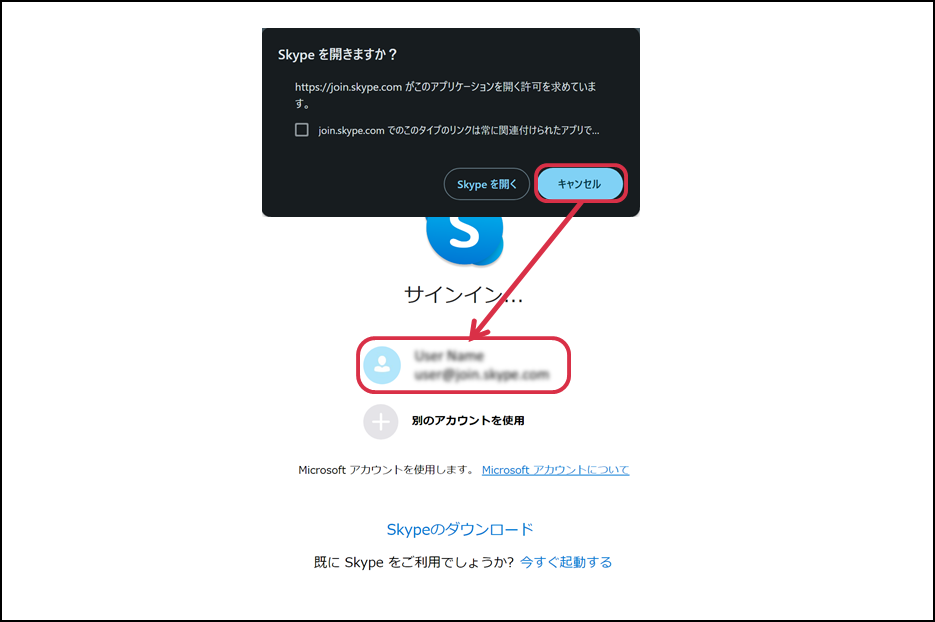
#### ② Access the invitation link from your browser
If a pop-up appears prompting to launch the application, click "Cancel."
Select your Skype account and sign in.
Access the invitation link from a browser
{% hint style="danger" %}
This method may not work with certain online meeting tools or specific versions.
{% endhint %}
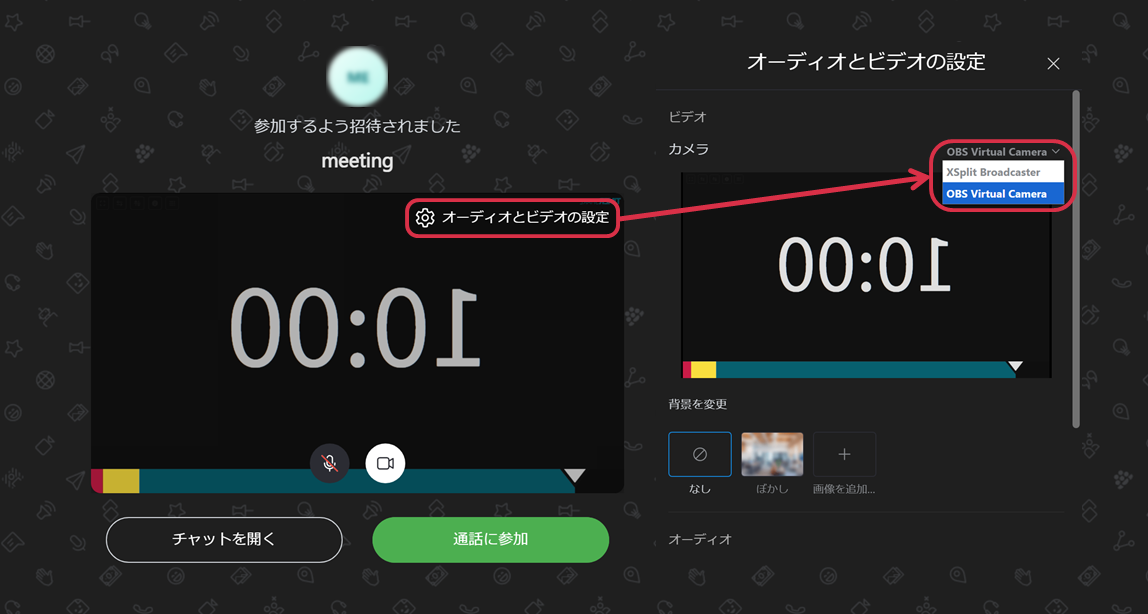
### 4. Switch the sub-user's camera to the virtual camera
Click 'Audio and Video Settings,' change the camera to 'OBS Virtual Camera' or a similar virtual camera, and join the meeting.
Select Virtual Camera
{% hint style="info" %}
During this setup, turn off the sub-user's microphone. It is recommended to use the main user's microphone for the meeting.
{% endhint %}
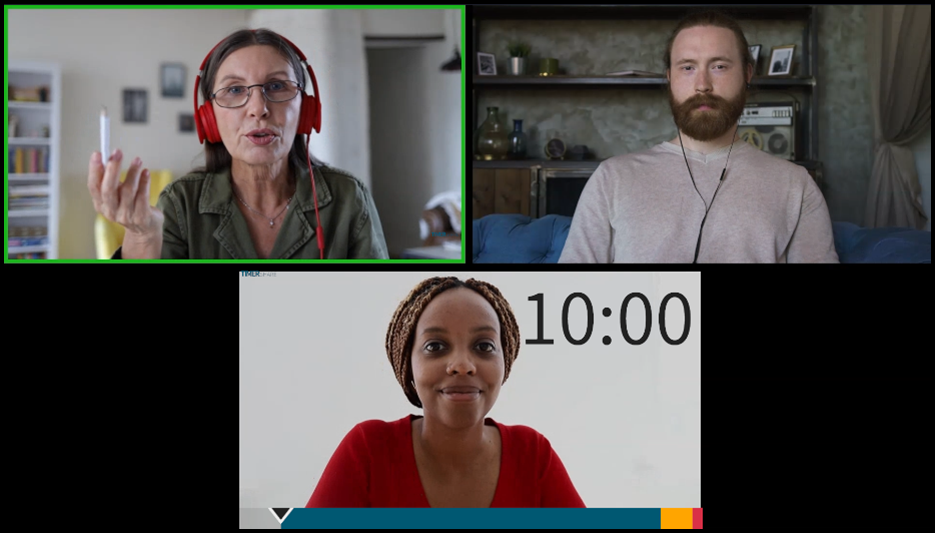
### 🎉 An independent timer has been successfully set up in the online meeting
Display TIMERshare in Online Meetings
By the way, TIMERshare is accessible from any internet-connected device (Desktop/Mobile) via a browser, making it easy to control the timer from your smartphone without switching browsers during the meeting.
{% hint style="success" %}
If there’s no screen sharing during the meeting, you can set the sub-user’s screen to 'Spotlight' or 'Pin for Everyone' (names may vary depending on the tool) to make the timer more noticeable to participants.
{% endhint %}