Xsplit Broadcaster

Step-by-step instructions on how to integrate OBS Studio with TIMERshare.

TIMERshare can be easily integrated with Xsplit Broadcaster, a powerful free streaming and recording software. Integration with Xsplit Broadcaster allows you to display timers on online meeting tool screens or directly on the live stream broadcast screen.

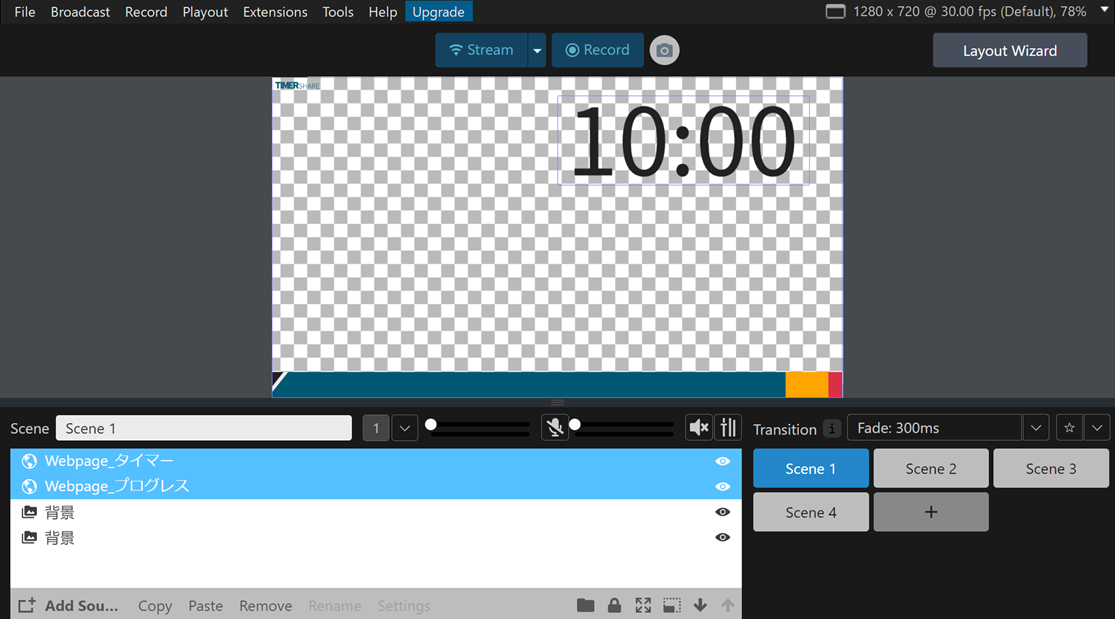
Additionally, TIMERshare offers the ability to separate timer elements individually and set the background to transparent. This allows for seamless integration of the timer with other video or presentation materials, enabling flexible placement according to the screen layout.

Looking for Xsplit Broadcaster? You can download it here. https://www.xsplit.com/broadcaster

The following step-by-step instructions may vary depending on your environment or software version. Please note that this is not a guide for using the software itself. Company and product names mentioned are trademarks or registered trademarks of their respective owners.


Add TIMERshare to Xsplit Broadcaster

1. Add 'Webpage' to Sources
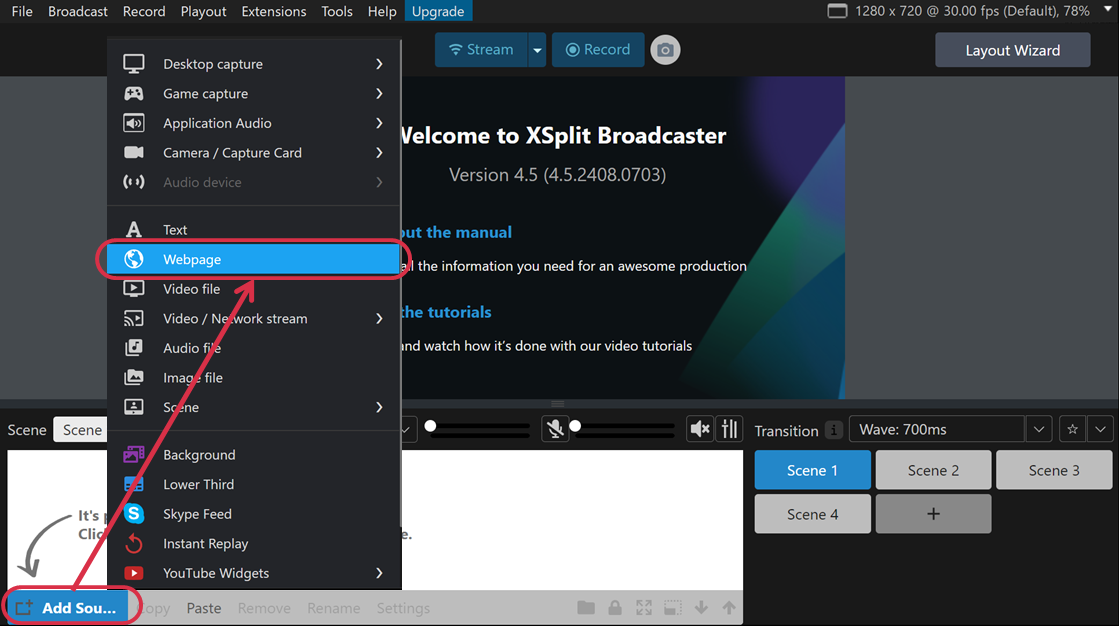
Select "Scene 1" or similar, then click "Add Source" at the bottom left of the screen and choose "Webpage".

ソースへ「Webpage」を
Add 'Webpager' to Sources

2. Set the URL Field

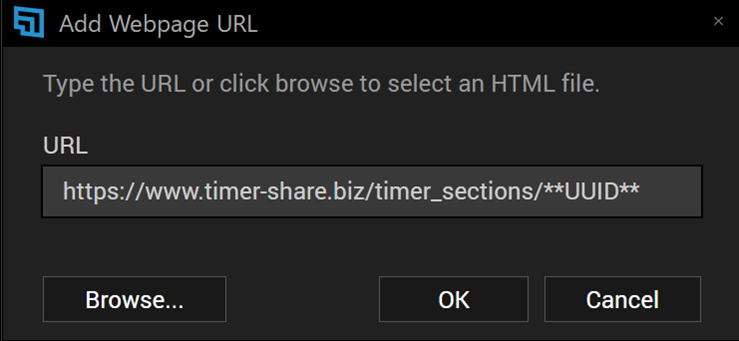
In the 'Add Webpage URL' window that appears, paste the URL of the TIMERshare viewer screen into the URL field.

URLフィールドの設定
Set the URL Field

For instructions on obtaining the viewer screen URL, refer to 'Get Share Link.'

3. Set Display Size

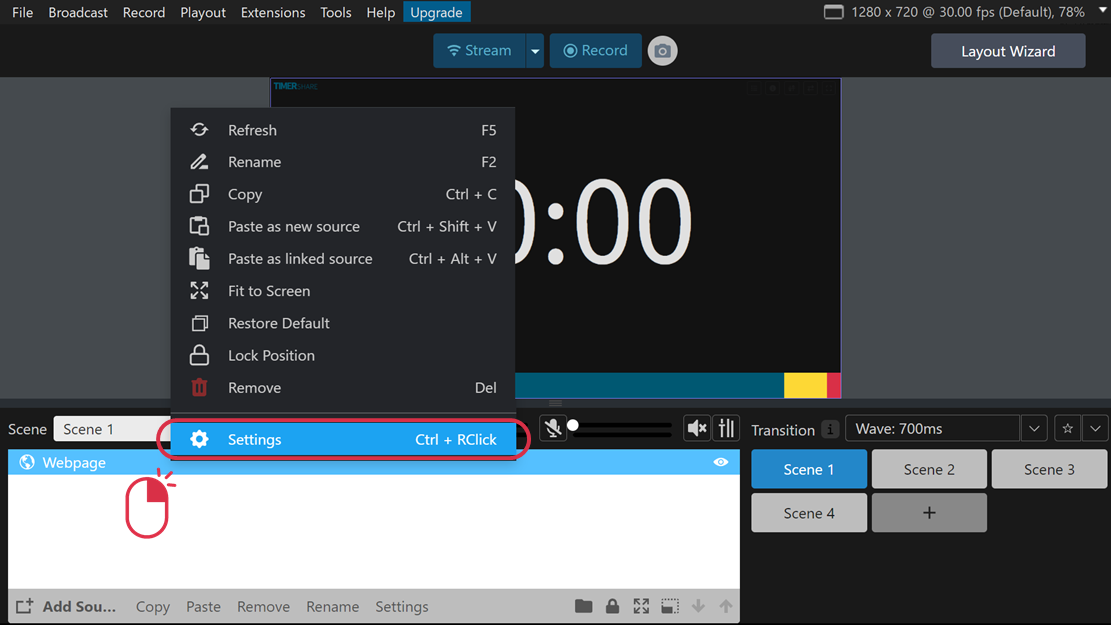
Right-click the created source and select "Settings."

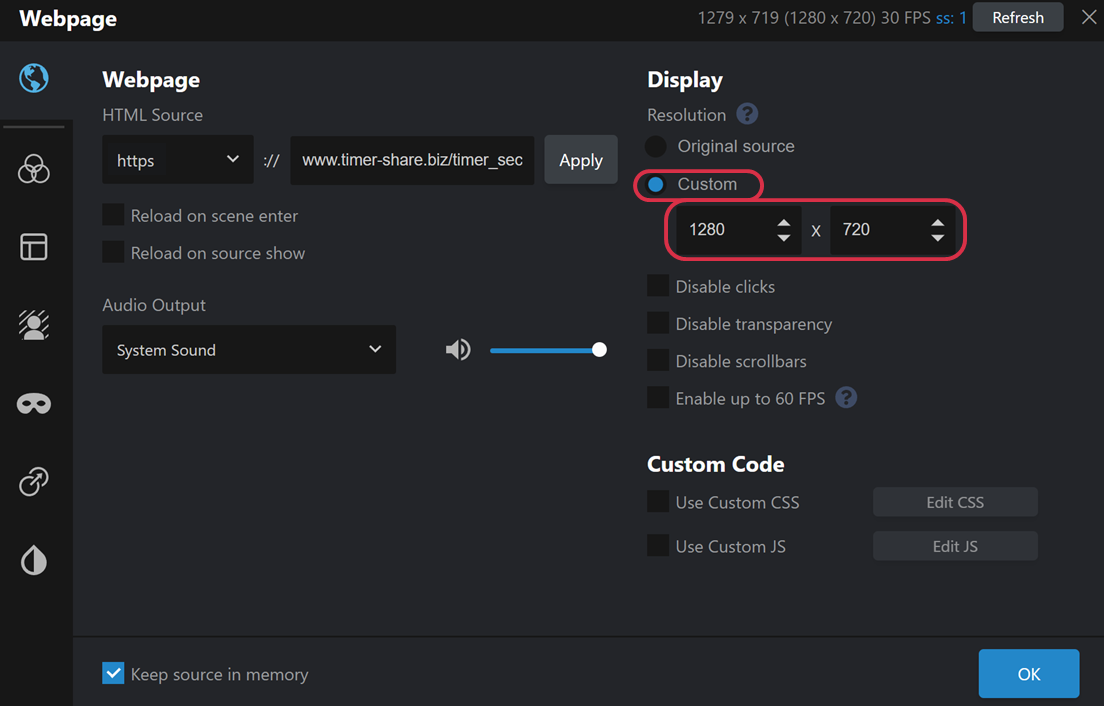
Change the 'Display' setting from 'Original source' to 'Custom' and set the width to 1280 and the height to 720 (HD / 16:9 aspect ratio).

画面サイズを設定する
Set Screen Size

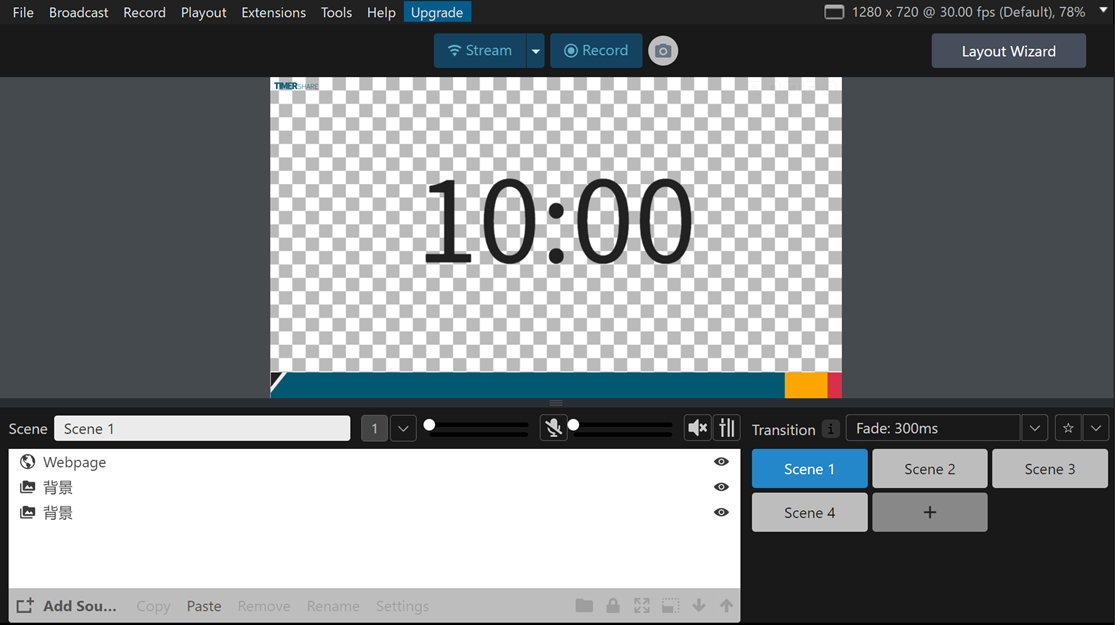
🎉 TIMERshare Displayed in Xsplit Broadcaster
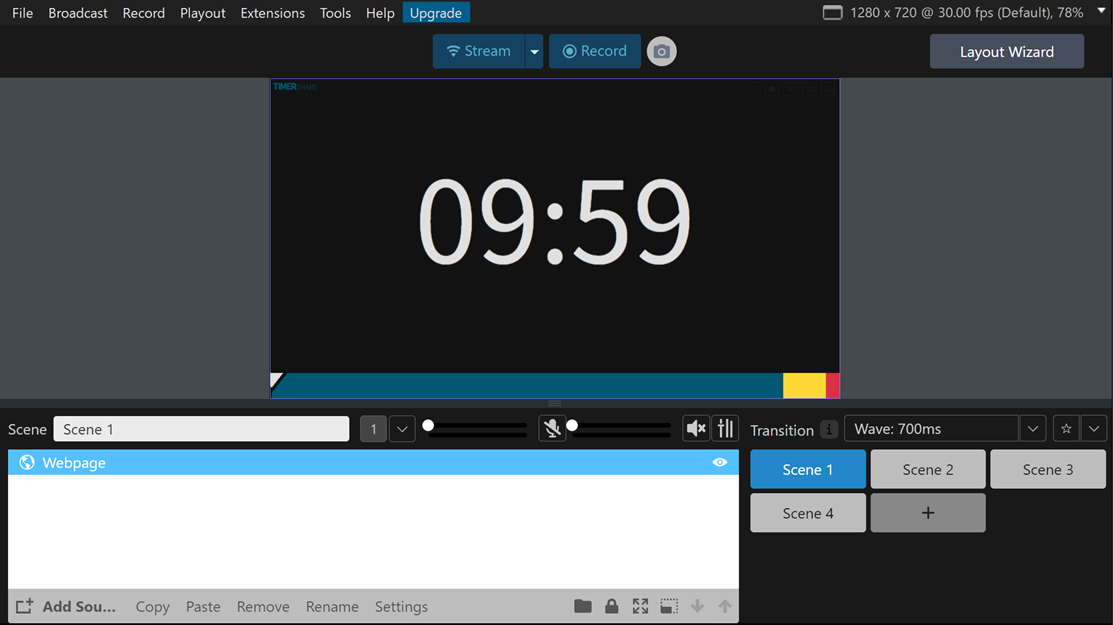
Try starting the timer from the controller screen.

By the way, TIMERshare can be accessed from any internet-connected device (Desktop/Mobile) via a browser. This makes it easy to control the timer from your smartphone, even if other tools occupy the screen during streaming, ensuring uninterrupted flow.

Refer to the following items according to your use case.


Display Timer Over Camera (Use with Camera)

By setting the background to transparent or separating timer elements individually, you can seamlessly integrate the timer with other video or presentation materials, allowing flexible positioning according to the screen layout.

1. Set Background to Transparent

No chroma key blending or filters are needed. Simply add the URL parameter timer-bg-transparent to the viewer's share link, and the background will become transparent.

ex. https://timer-share.com/timer_sections/UUID?timer-bg-transparent=true
背景を透過色にする
Set Background to Transparent

2. Separate Timer Elements for Screen Layout
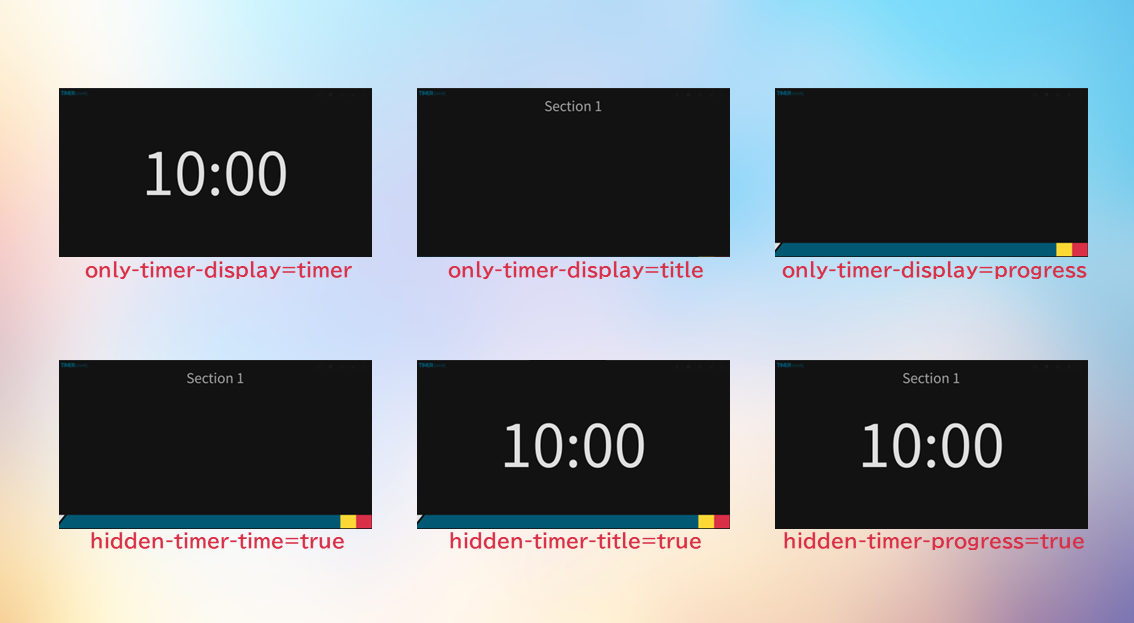
Screen trimming can be cumbersome. Simply add the URL parameter only-timer-display to the viewer's share link to display only the specified elements.

ex. https://timer-share.com/timer_sections/UUID?only-timer-display=timer
要素を分離して画面を構成する
Separate Elements for Screen Layout

When specifying multiple parameters, start the first parameter with '?' and separate the second and subsequent parameters with '&'.

ex. https://timer-share.com/timer_sections/UUID?only-timer-display=timer&timer-bg-transparent=true


Separate Timer and Camera into Different Scenes for Quick Switching

1. Set up 'Camera Scene' and 'Timer Scene' in Xsplit Broadcaster
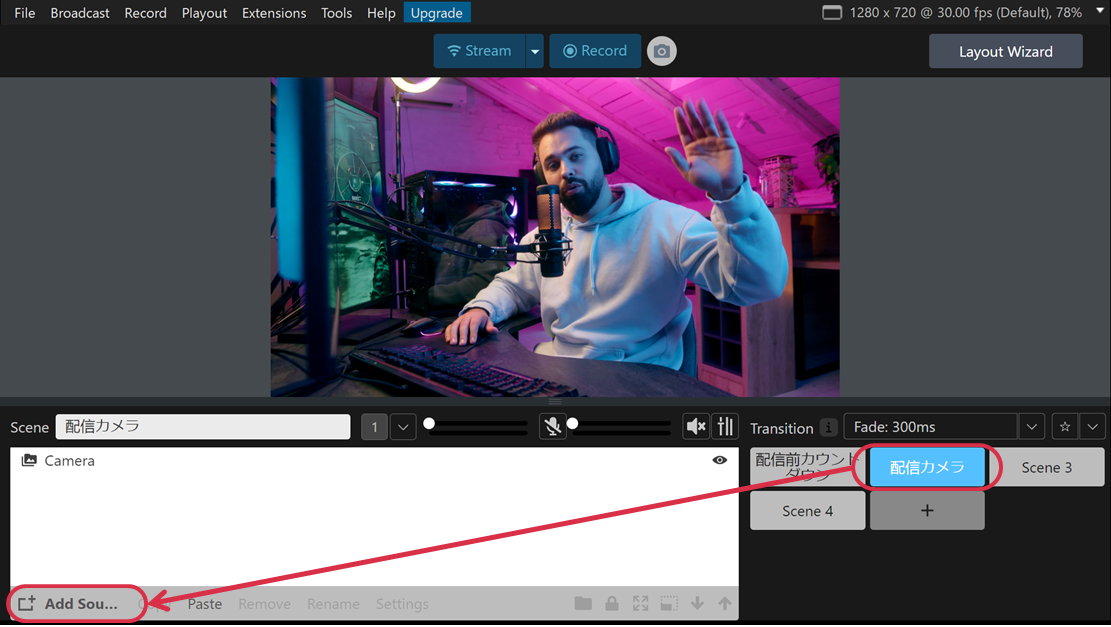
Add new scenes in Xsplit Broadcaster and give them clear, descriptive names.

「カメラ用シーン」と「タイマー用シーン」を作成する
Create 'Camera Scene' and 'Timer Scene'

2. Select Scenes to Quickly Switch Between Timer and Camera
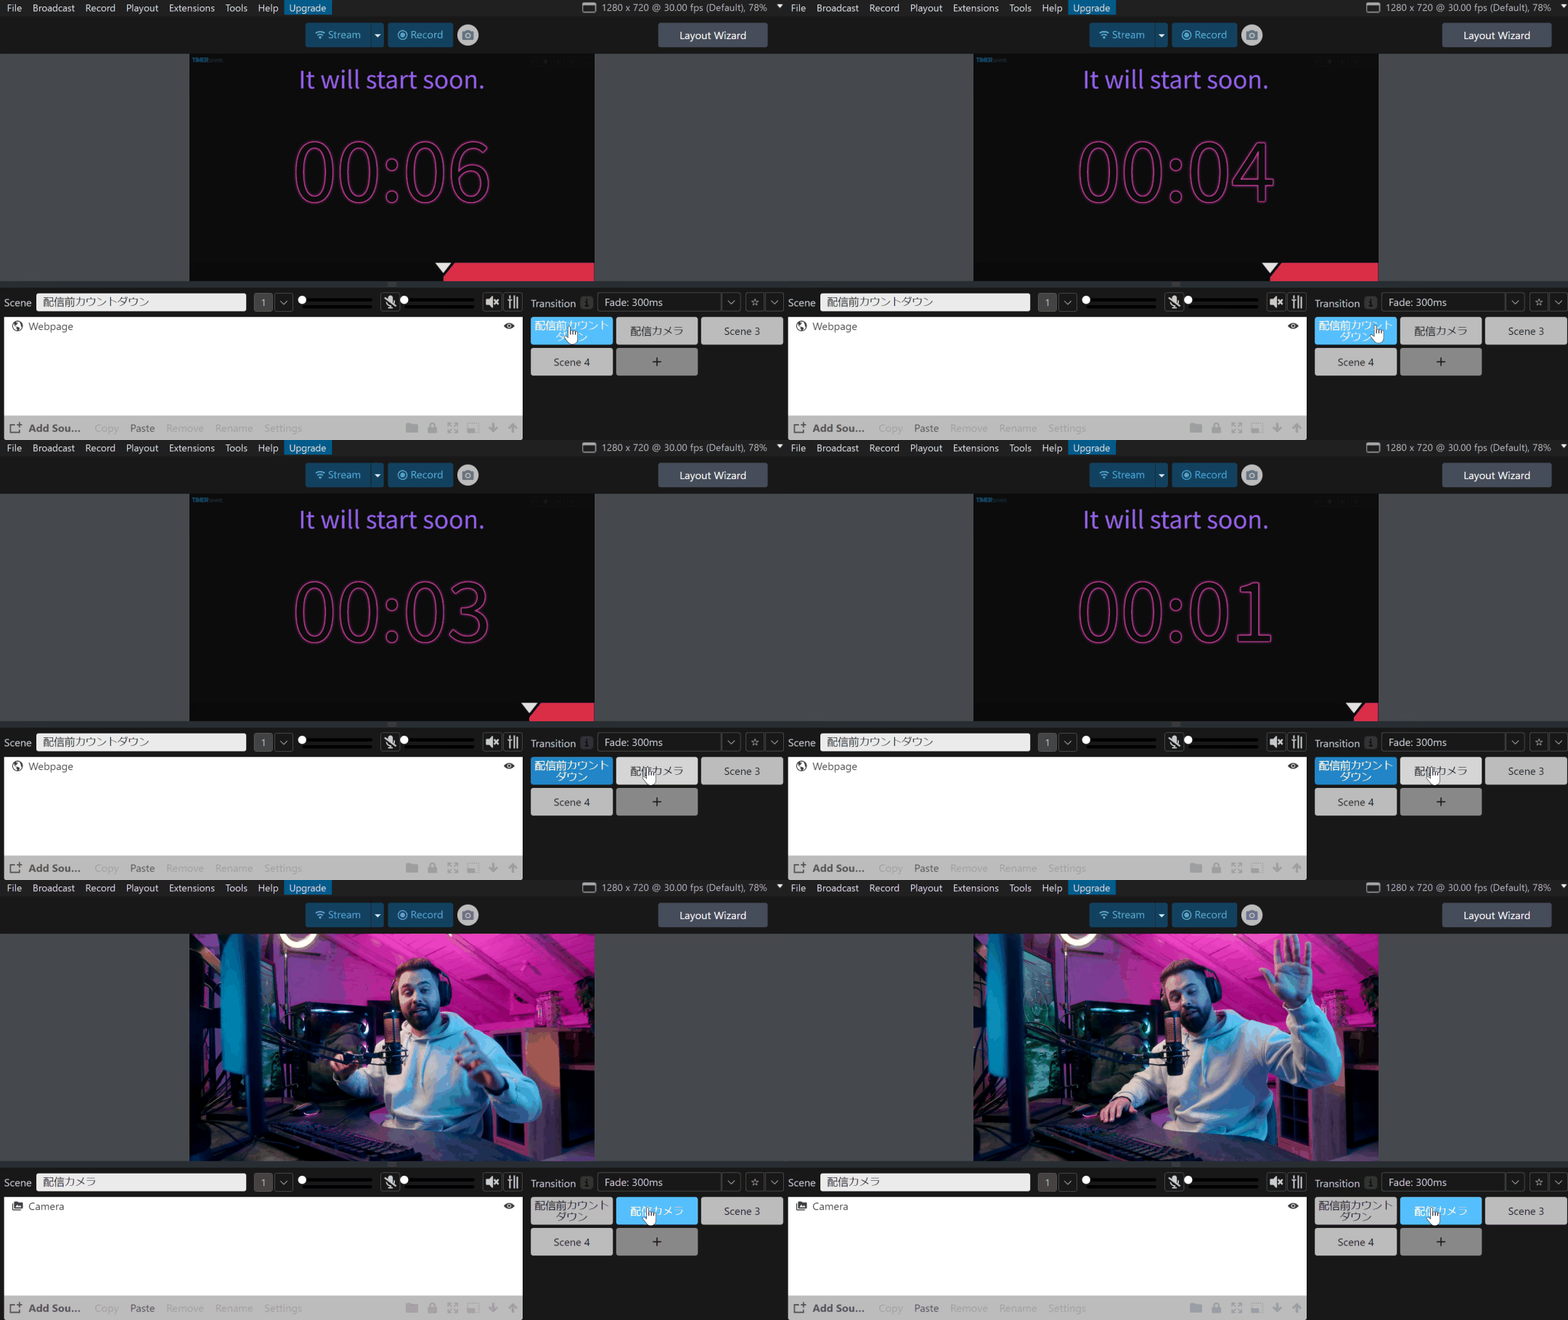
You can select scenes to quickly switch between the timer and camera.

タイマーとカメラをクイックに切り替える
Quickly Switch Between Timer and Camera

Last updated

Was this helpful?